easy simple cheap free floatation tank plans – version 2b
Pratyahara Tanks is the worlds first completely open source tank manufacturer. Our tank (known as the Black Beauty) is constructed from 100% off-the-shelf parts. Building this tank requires very little carpentry skills – to build a Black Beauty tank is simple.

Here are a lot of photos of the tank.
and here is a video of me using it.
MATERIALS
- 2 Norwesco 360 gallon containment tanks – one will hold the water, one will serve as the top of your tank. Dimensions of containment tank are 93″ Length x 69″ Width x 16″ Height
- A hydrometer to measure salinity of the water which reads specific gravity from 1.0 to 2.0. They tend to be calibrated for 60 deg F, but that’s close enough for our work. You also will need to get the cylinder to hold the hydrometer, which they should have also. Dont get standard aquarium hydrometers because those saltwater tanks only have a spec gravity of 1.025.
- 7 pieces of plywood (optional, to put some space between the tarp and the tank bottom – picture)
- 2-inch thick styrofoam (optional also – I dont even know why I ever listed this).
- A pump/filter system.
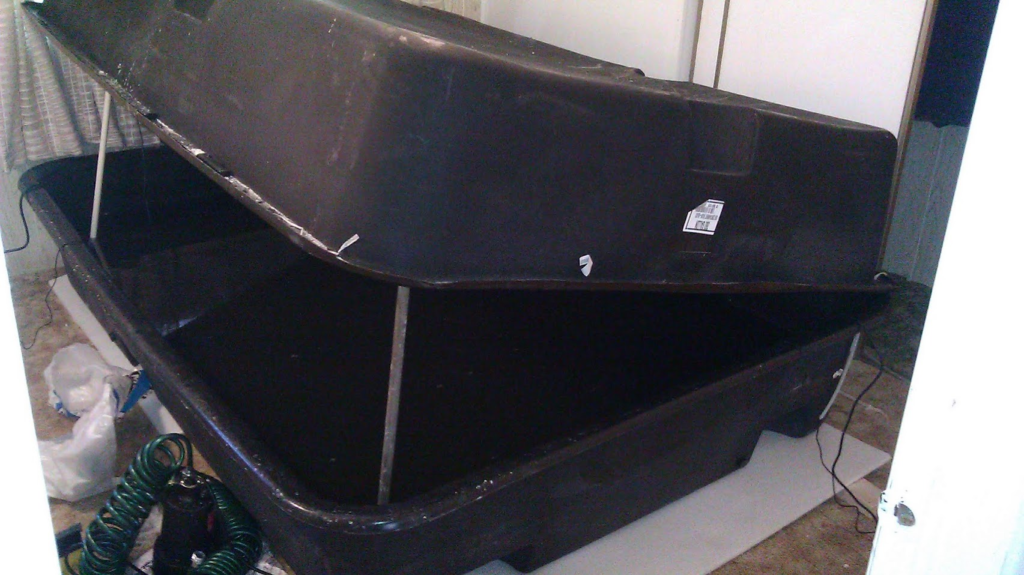
- 2 inflexible rods – used to prop up the tank top while adding salt. pvc or hard wood dowels 4 1/2 feet long are good – Here is a picture. … this is during your build phase. You may be successful attaching drawer guides (glides) between the bottom and top tank so you can slide it as shown here but that approach did not ultimately work for me. So I drilled holes and used plastic cinches to connect the bottom and top parts.
STEP-BY-STEP-INSTRUCTIONS
- The base of your tank is a tarp, some 2x4s and 2 inch thick styrofoam.
- Then you put down one containment tank
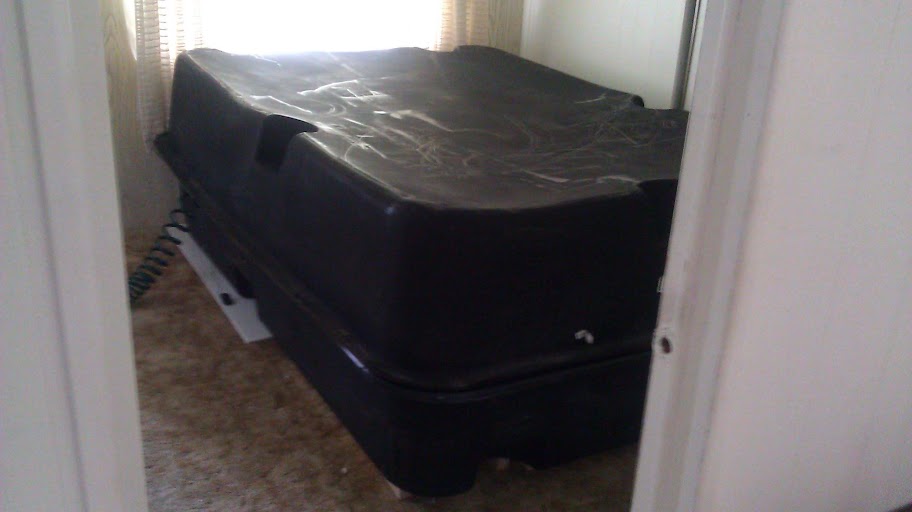
- Put the 2nd containment tank on top of the first – picture
- Drill holes in both tanks and slide a cinch through the holes to make your hinged door – here is a picture and here is another.
- Fill the tank: start with just a few inches of water, enough to cover the heaters. Let that get up to 94 deg F, making use of an external thermometer as reference point. Then add more and more water. But never more than 250 gallons total. See the calculations for how to convert inches of water into total gallons as a function of the tank dimensions. UPDATE: a baptismal heater doesnt need all of this coddling: it can heat very large bodies of water easily. Also, I tend to simply get hot water from the shower and then dump salt into that.
- Salt the water. Slowly. 1 bag at a time.
- Unplug all electricity and float
CONCEPTUAL TANK DISCUSSION
The Tank Room
A nice tank room that can be comfortably heated is wonderful. Here are other things to consider about the room itself.
electricity
Here is a formula:
watts / volts = amps
since most houses are 120 volts and 15 amps, this implies that you can pull at most 1800 watts of power. So buying 2 1000 watt aquarium heaters is not going to work with standard setups: I know, I threw my fuse breaker when I tried. I have 1 1k watt and another at 300 watts and so far that is fine.
You could re-wire the power from the breaker to the power supply with a different guage wire, or get dedicated wiring, but the purpose of this project is to make everything work with off-the-shelf standard parts and settings.
dimensions
3 feet longer and wider than the tank seems to be an absolute minimum
restroom
A restroom near/attached to the tank room is very convenient.
Tank
Get two 360 gallon containment tanks from NTOTankOutlet.

Tank Framework
Lay down a tarp
You need to get the tank off the floor with some 2x4s. And then put 2-inch styrofoam over that.
Next, simply put the two containment tanks on top of each other like this:

Then drill holes in one side and cinch the top to the bottom on one side to create a hinge like this:
I actually think padlocks are better than plastic cinches because you will find yourself taking them off and on to situate the heaters and also when you drain the tank for cleaning you will need to take off the top. Finally, some people are claustrophobic and would prefer to float without a top.
Spa Pack (pump/filter)
In order to filter the water and warm it, we have to go with a sealless mag drive pump and filter modules.
I’ve found 2 good choices (LifeGard Aquatics and Pondmaster) and I went with pondmaster.
UPDATE – a very good set of articles was published to the Reddit FloatTank group showing a new spa pack setup. See the “Scope for Future Tank” section for details.
LifeGard Aquatics
- we want a sealless magdrive pump that can deal with 350 gallons of saltwater (though we will only have 250)
- we a triple capacity mechanical filter for particle filtering
- we want a triple capacity chemical filter that has carbon in it
- ultraviolet filtering is loved by some professionals. others think it is a waste of time
- ozone in a closed space will kill a lot, but might also kill you. So let’s drop that also.
- hydrogen peroxide will become a good friend of yours
- weekly and monthly sanitization tips are forthcoming
Temperature Control & Monitoring
Water Thermometer
Submersible Aquarium Heater
In between floats, you need to keep the water warm or the epsom salt will precipitate. So you need a good aquarium heater for that. While 300W is just fine for 300 gallons when you speak of waterbed heaters, my experience is that it is not enough when dealing with aquarium heaters. You need 3-6 watts for every gallon of water you want to heat above 80 deg F. Let’s use 6 watts since we have salt water, whose specific heat capacity is lower than plain water. But on the other hand, you can only have about 1800 watts of total heating at the max. I suggest 1300 to 1600 watts of total heating power. So you’re going to need two 800 watt heaters, one 800 and one 500 or one 1000 and and 300/500 or some combination like that.
Now, there are 7.5 gallons of water in a cubic foot. And so we have the various gallons of water that we can deal with based on total wattage:
- 1300 watts => 216 gallons of water
- 1500 watts => 250 gallons
- 1600 watts => 266 gallons
UPDATE: in my opinion baptismal heaters are the way to go although a washing machine heating element might work.
Epsom Salt
Crop Production Services (sometimes aka Agricultural Garden Supply) was a good place for salt. Look for a place that sells lawn fertilizers.
Then setup your spa pack for intake and discharge by adding some piping.
Then heat the water to 104F (the maximum the spa pack is legally allowed to do) and gradually add salt.
Testing for Salinity
You can get fancy and buy a salinity pen, but you can also get the job done for just 10 bucks with these two products:
Filling the tank
First, start with about 3 inches of water. NO SALT. Then submerge your two heaters. Make sure you can get that up to 95 degrees.
Your maximum height is based on how many gallons of water you can heat. Let’s say you can heat 1500 gallons of water. Since there are 7.5 gallons of water in a cubic foot, we can use unit cancellation mathematics to see who many cubic feet of water we can heat:
(1 ft^3 / 7.5 gal) x 250 gal = 33 ft^3
Now the tank we have it quite wide, so the water will not be very high. Let’s convert cubic feet to inches and see how many cubic inches we can afford to heat. 33 cubic feet is 57,024 cubic inches. Now the tank slopes, but the given width and length are 93″ and 69″. So let’s multiply those together and divide that product by 57,024 to get the height available to us. The result is 8.8 inches. Most people recommend 10 inches, but I think we can get by.
Let’s do the 1300 watt calcs
216 gallons is covered by 28.8 ft^3
1 ft^3 = (12 inches)^3 = 1728 inches cubed
therefore 28.8 ft^3 is 49766 inches
So we have 7.75 inches of water available at 1300 watts. That’s not very high. I’ve done it, but dont recommend it.
General Comments
Total cost
- two containment tanks: 655 + 190 S&H = 850
- spa pack with mechanical filter, no ozone: 400 + 50 S&H = 450
- submersible aquarium heaters – 360 + 9 S&H = 370
- water thermometer – 8.00 + 7 S&H = 15
The total cost is 1700.00. Most tanks will run you 2000-3500 used. Then we can add in epsom salt for 300 bucks for a clean 2 grand for the whole deal!
Optional Products
You might want a shockbuster, although you will probably opt to float with all heater power off. I was influenced by Tim Strudwick in this case: he built a tank that costs 5 figures and it has NO heat on during the float. So: the heat and pump/filter for my tank are manually added and removed to the tank when used. No fear of electric shock with this approach.
Scope for Future Tank
An excellent pump filter setup was revealed in these 2 posts
- https://www.reddit.com/r/FloatTank/comments/1871kql/zen_float_filter_bags/
- https://www.reddit.com/r/FloatTank/comments/189biu6/zen_float_tank_pumpfilter_redo/
In short
Iwaki MD15RLT Water Pump
I located this pump – https://premiumaquatics.com/products/iwaki-md15rlt-water-pump-japanese-motor.html
since it is mag-drive, can we presume it does not have a rubber seal that can rot due to salt?
I read in the description Includes 1 meter power cord, but you will need to purchase a grounded plug to wire onto it. -> does this mean you needed to do something other than just plug it into a socket?
Inland Seas Nu-Clear Model 533 Mechanical Canister Filter
located – https://www.marineandreef.com/Nu_Clear_Model_533_Canister_Filter_Inland_Seas_p/ris00533.htm
it says it is for salt water up to 90 gallons. How many gallons of water are in a Zen Float Tank? My guess is 200… but typically products can do more than they advertise.
I guess there is a way to know when to replace the carbon filter?
The description says Includes pressure gauge -> what do you use this guage for?
Coralife Turbo-Twist UV Fish Tank Sterilizer 6X
located – https://www.saltwateraquarium.com/turbo-twist-6x-ultraviolet-sterilizer-18w-250-gal-coralife/
[…] 2011, the Black Beauty DIY Isolation Tank was built and used for 6 months of great joy before job requirements forced me to sell my $5,000 […]
[…] 2011, the Black Beauty DIY Isolation Tank was built and used for 6 months of great joy before job requirements forced me to sell my $5,000 […]
[…] I had been doing a survey of containment tanks in preparation for creating the next evolution of The Black Beauty DIY tank: […]
[…] 2011, the Black Beauty simple DIY floatation tank was built. Scouring the ‘net for containment tanks, I fell in love with the 325 gallon White […]
[…] 2011, I built and used The Black Beauty DIY floatation tank: it used 2 containment tanks — one as the bottom and one as the […]
[…] removing a water heater, then one can do so with the confidence that it supplies a quality session. The Black Beauty DIY tank and the Ragtop DIY Tank both use passive heating in this manual […]
[…] 2011, I built and used The Black Beauty DIY floatation tank: it used 2 containment tanks — one as the bottom and one as the […]